CategoriesListsMicrosoft 365Power Apps

Power Apps – Patch function

Hello, new Post Today. We’re going to understand how to use Patch function with SharePoint list. For this Example I used a “Task List” who contains text , choose , lookup and numeric columns.

Let’s see “Patch” Function.

Syntax

Patch( DataSource, BaseRecord , ChangeRecord1 ,ChangeRecord2,…)

Parameters:

  • Data source: the data source who contains your records. In our case is our SharePoint list.
  • BaseRecord : the record to update or use Defaults to create new one.
  • ChangeRecord(s): one or more record who contains properties to modify.

Pills:

  • You can use Patch tu create new record or update existing record.
  • Patch will update only specified properties, other will ignored.

Example

Here our task list:

Task list image

Create new record:

Patch(
    Tasks,
    Defaults(Tasks),
    {
        Title: "New Task",
        Description: "Our task descriptions",
        Status: {Value: "New"},
        Project: {
            '@odata.type': "#Microsoft.Azure.Connectors.SharePoint.SPListExpandedReference",
            Id: 1,
            Value: "Project 1"
        },
        ProjectID:1000
    }
)

Key points:

  • Title and Descriptions are text field, so we should pass text value. Same for ProjectID who is Number and we must pass numeric value.
  • For Choose value, function expect record: {Value: “New”}
  • For Lookup column, we must pass record with ‘@odata.type’, Id and Value:
 '@odata.type': "#Microsoft.Azure.Connectors.SharePoint.SPListExpandedReference",
            Id: 1,
            Value: "Project 1"
        }

That’s all! If we want to update an existing record? You must get it and pass to patch function instead Defaults(). In this case, I used Lookup function to retrieve record to update:

LookUp(Tasks,ID=4)

So, complete code is:

Patch(
    Tasks,
    LookUp(Tasks,ID=4),
    {
        Title: "Old Task",
        Description: "Our task descriptions",
        Status: {Value: "New"},
        Project: {
            '@odata.type': "#Microsoft.Azure.Connectors.SharePoint.SPListExpandedReference",
            Id: 1,
            Value: "Project 1"
        },
        ProjectID:2000
    }
)

This is the official link of patch function.

I hope this post should help you.

CategoriesVarious

New look and feel

Hello guys, I recently update my site with new look and feel. I hope you like it.  It’s more “leaner”, so we can focus on technical informations 🙂

Have a nice day!

CategoriesListsMicrosoft 365SharePoint Online

Microsoft Lists in 1 Minute

What is Microsoft List

Let’s talk about Microsoft List. You can see “List” and others Mmicrosoft 365 App’s. You can use this awesome tool to create list to track informations (Assets, invetory, customers, issues ecc) and collaborate with your team members. If you know SharePoint List’s, this is appear very familiar.

Create new list

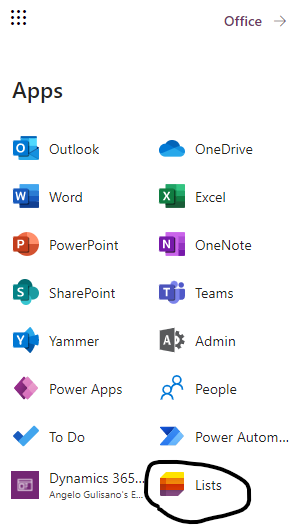
Click on the top-left corner:


App “Lists” and others Mmicrosoft 365 Apps…


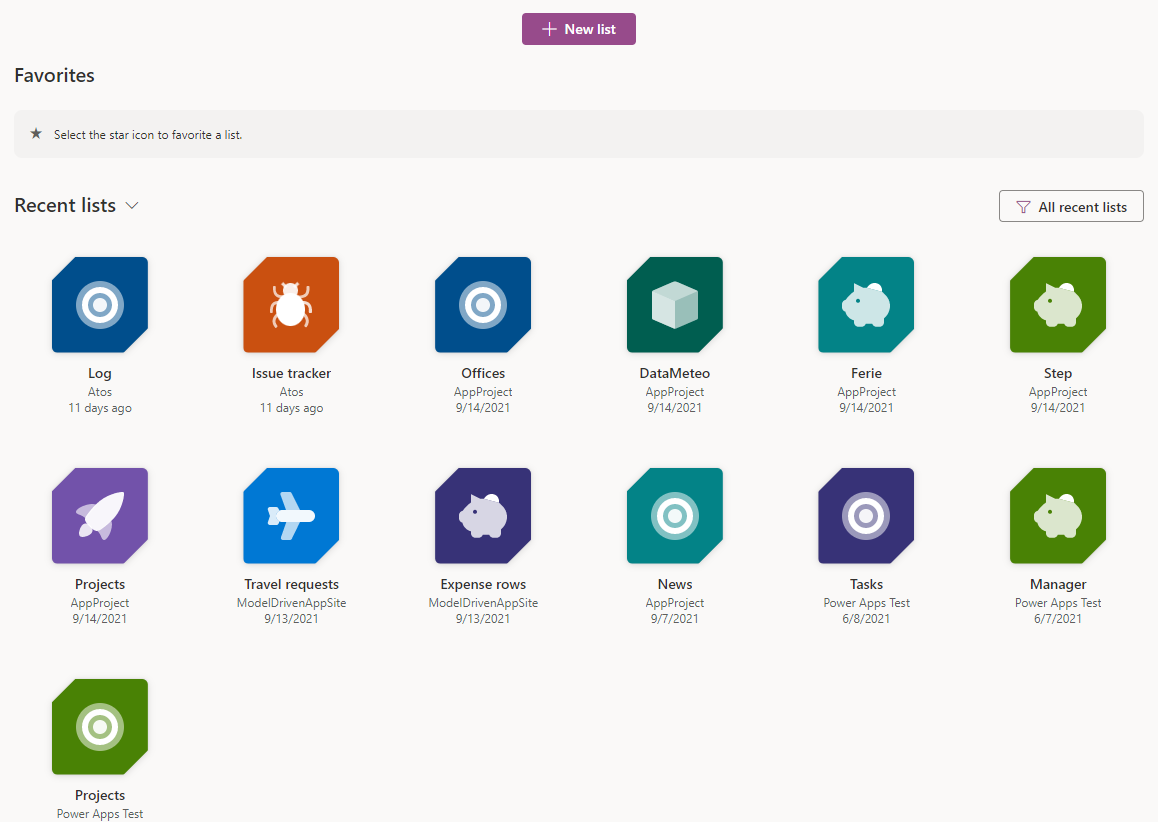
Now you can View and Open your recent Lists or create New List. Click on button   “+ New List”.

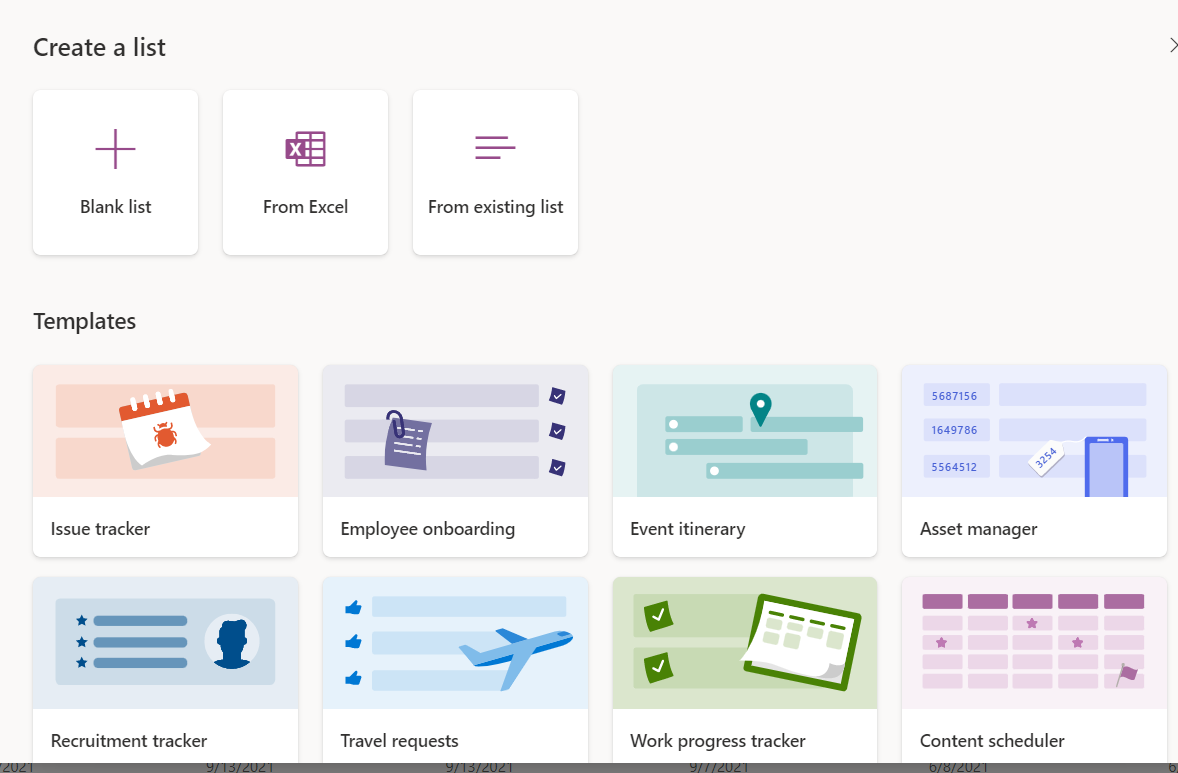
Now you have 4 choises:

  1. “Blank list” to create new list from scratch (we do this for this tutorial…)
  2. “Form Excel” to create new list , starting from excel file. It’s good starting point if you have some excel files and want to use List instead of them.
  3. “From existing list” to create list , starting from another list (also from list create inside SharePoint site).
  4. “Templates” if you click on one on template, you can create list starting from it.

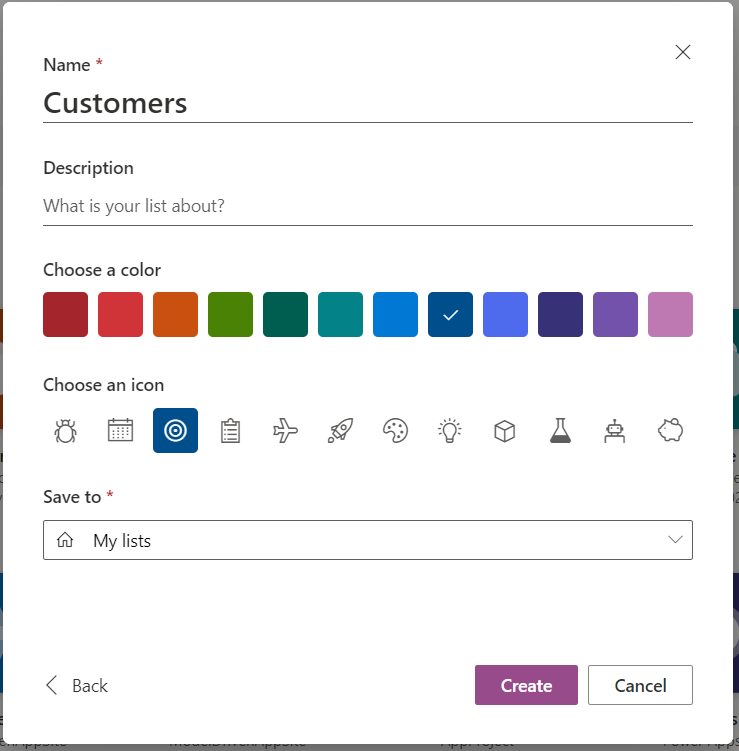
Click on “Blank list“, add list Name, description, color, icon,  choose where do you want to save your list (In “My List” or one of your SharePoint sites) and click create.

Customize your list

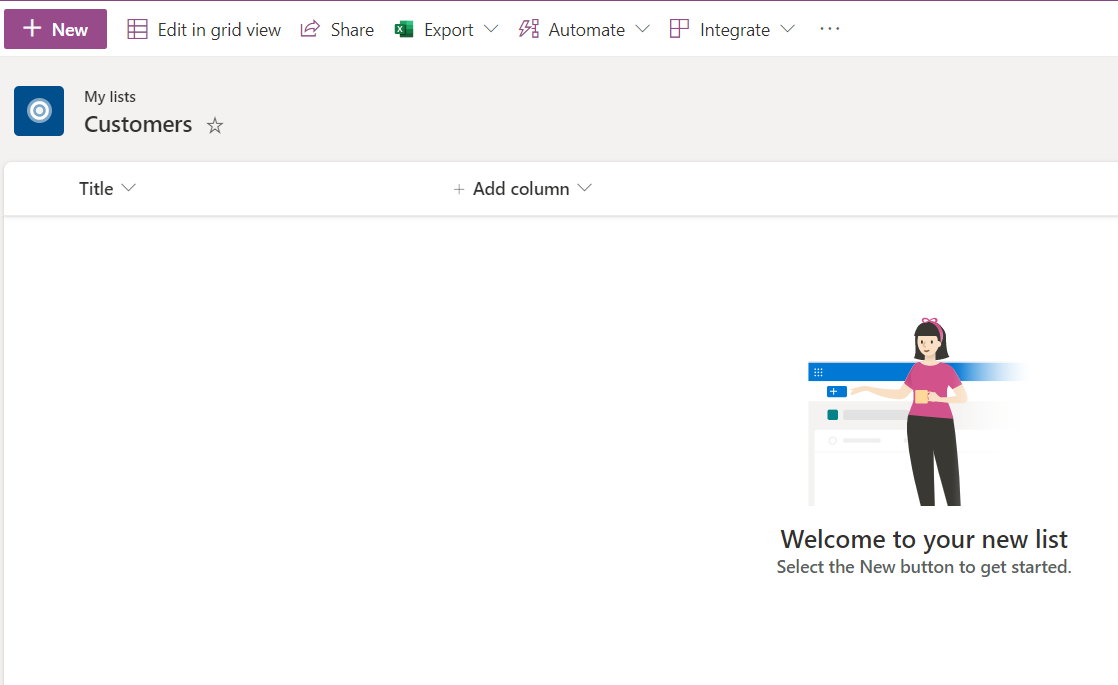
Now we have our Customer list and we can start to use it. First of all, we need to create some columns. Click on “+ Add Column”

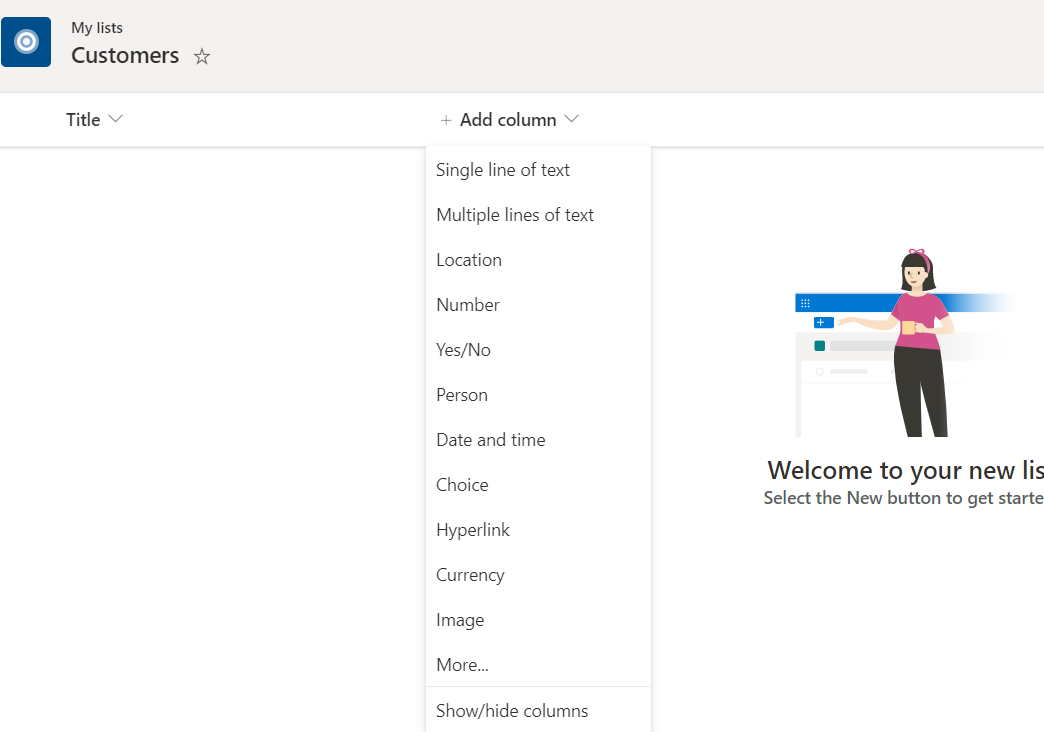
Now you must choose type of date you want to store in this column. Don’t worry if you don’t know what it is it…Ask yourself: “what I want to store in this column? Name of customer? Descriptions? Logo? if the customer is active or now?” This is the key, understand what you need to save. Let’s see common type of column:

  • Single line of text: Simply “text”: Use it for Customer Name or short description.
  • Multiple line of text.:Use it when you want to store more the one text rows…for example descriptions, notes etc.
  • Location: When you neet to track “where”.
  • Number: No description need 🙂
  • Yes/no: Use it if you want to track simply yes or no (Boolean) value. Fors example “is valid customer?” or “Is active customer?”
  • Person:To save People or group in your Microsoft 365 Tenant.
  • Date and Time:  To store date, for example “Expiration date”
  • Choice: To choice value inside a list of value. For example “New customer, Old customer, Inactive”. Or to save status: “Draft, Approved, Rejected”
  • Hyperlink: To save a link.
  • Currency: To store currency value…
  • Image: To store an image such as logo

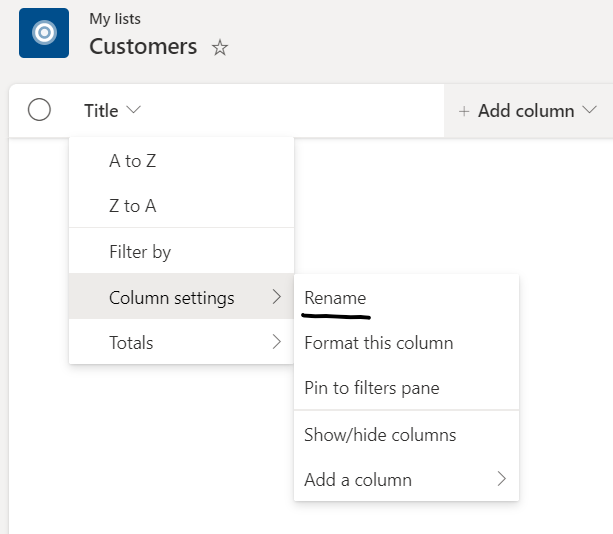
Keep mind, you have by default “Title” field , in your list. You can rename it.

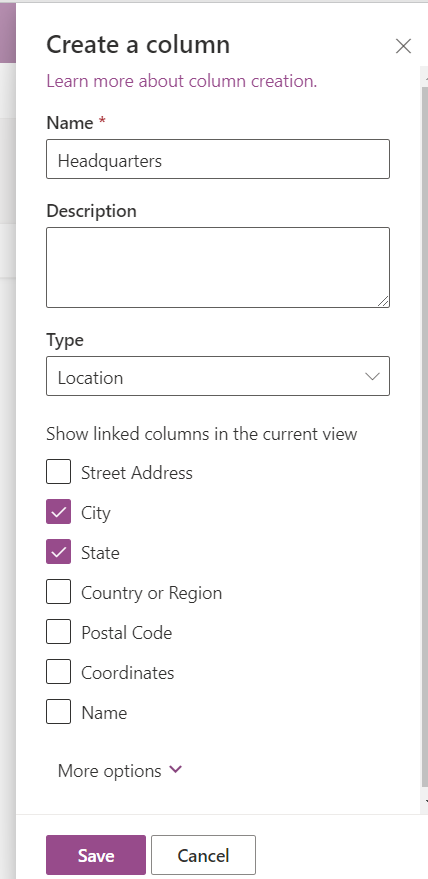
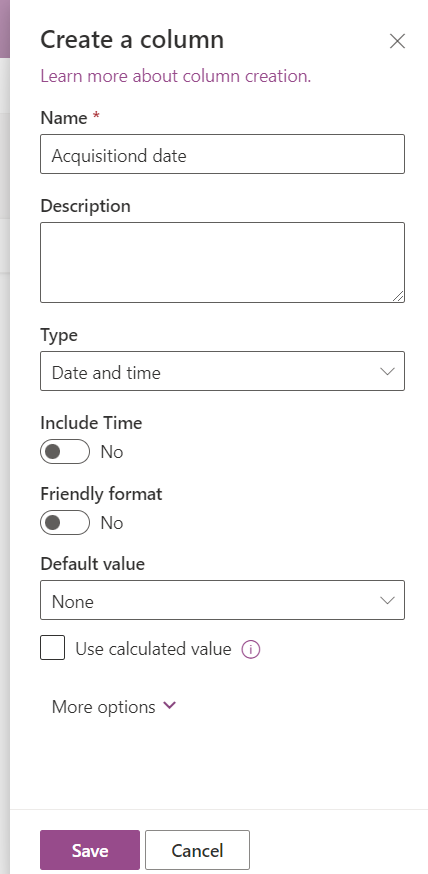
Now I rename “Title” with “Customer”, and create “Headquarters” and “Acquisitiond date”:

Use your list

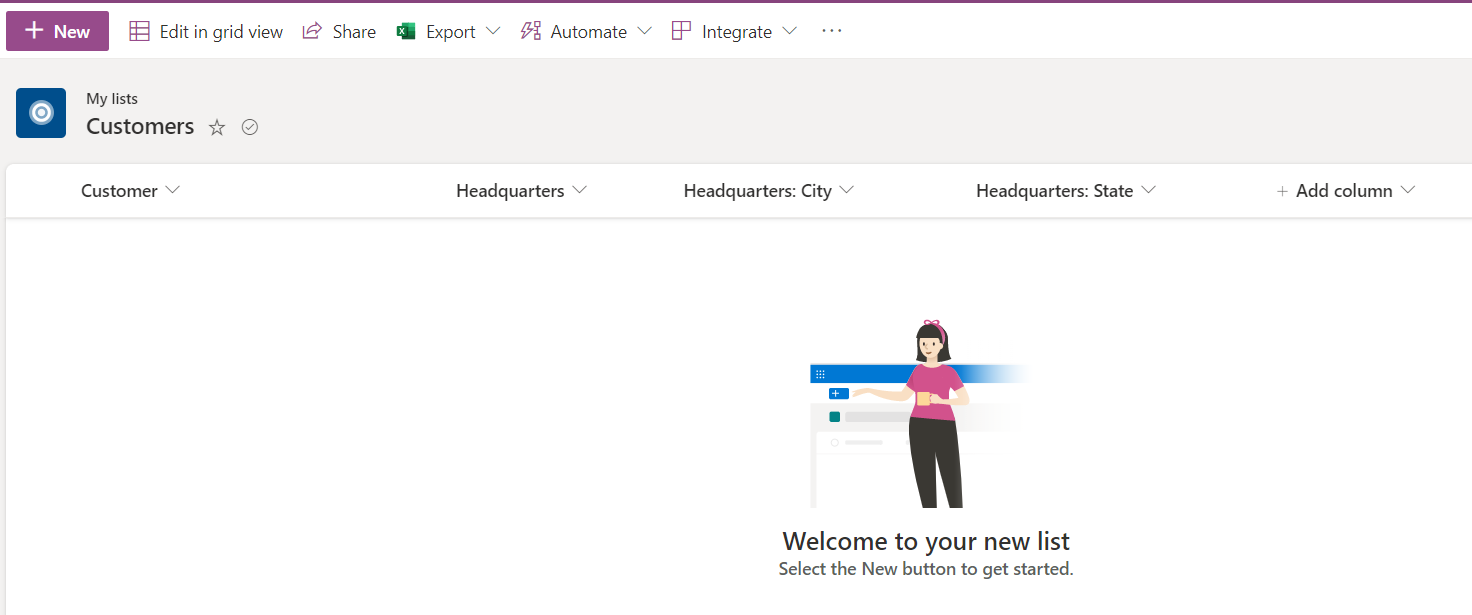
Now your list should appear like this:

Now you can click on “New” to add one record a time, or click on “Edit in grid view” to edit it like’s Excel file:

Keep mind, remember to click on “Exit grid view” to save.

I hope it help you..let me know with comment if you want another article on this argumeent. For example how to collaborate with colleague on this list, or how to create rules to send an email when people do something to this list or something else.

My Agile Privacy
This website uses technical and profiling cookies. Clicking on "Accept" authorizes all profiling cookies. Clicking on "Refuse" or the "X" will refuse all profiling cookies. By clicking on "Customize" you can select which profiling cookies to activate.
Warning: some page functionalities could not work due to your privacy choices: