Hello, Today we spoke (write 🙂 )about SharePoint list form customization. Basically, we have two way to customize existing form:
- JSON Formatting
- Edit form with Power Apps
We try to Explain how to customize form formatting with Json.
Format Form
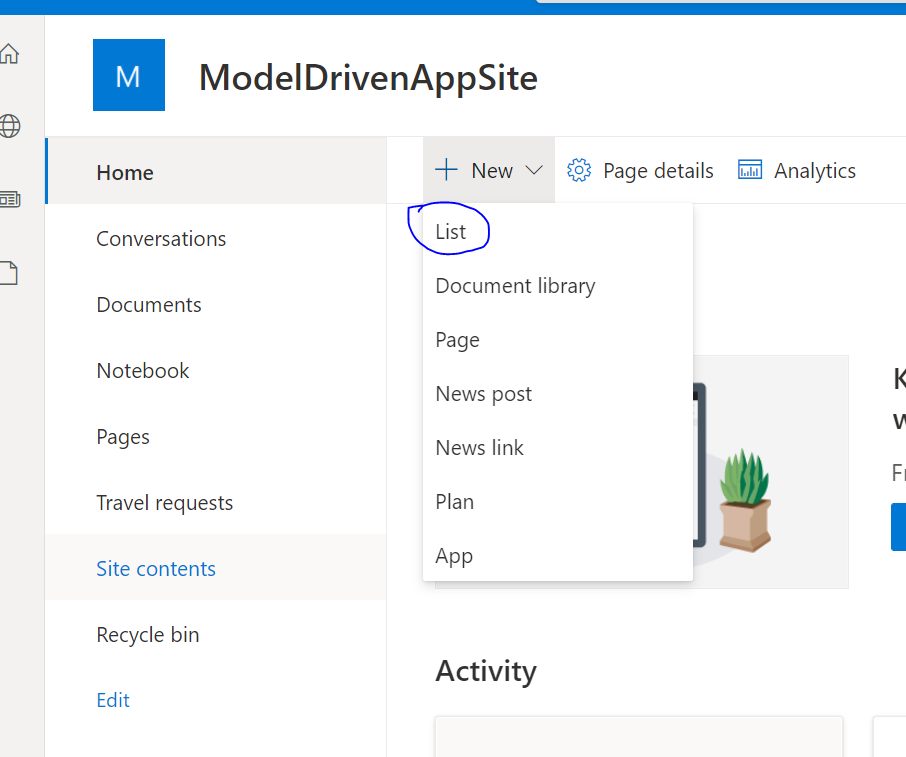
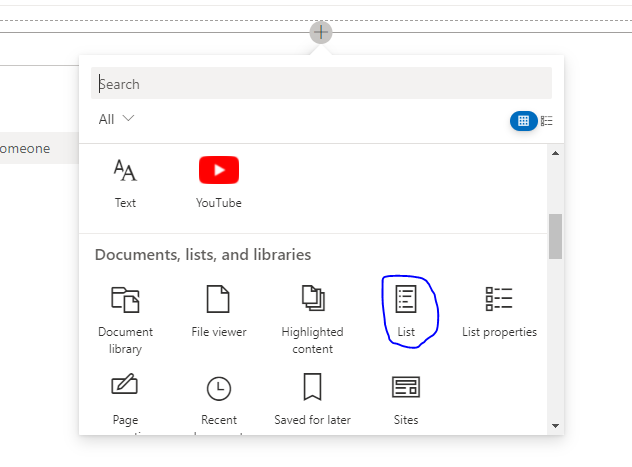
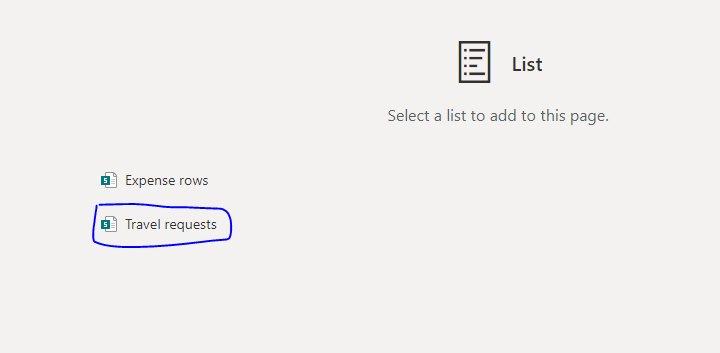
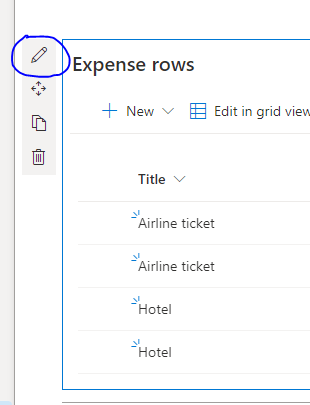
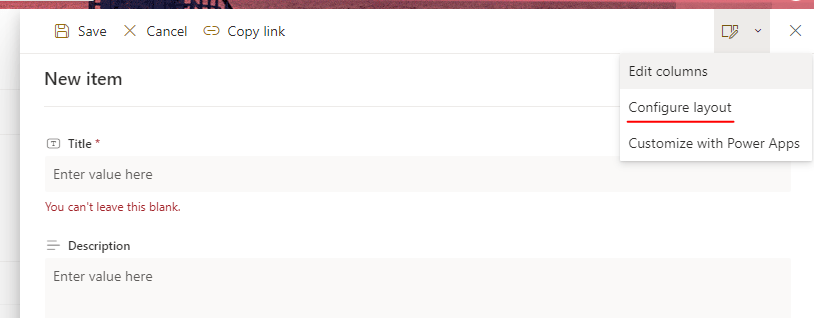
Go to your list, and click on New, click on the top right Edit form icon, e click on “Configure layout”.
Basically We can write some JSON to format these sections:
- Header
- Body
- Footer
Header customization
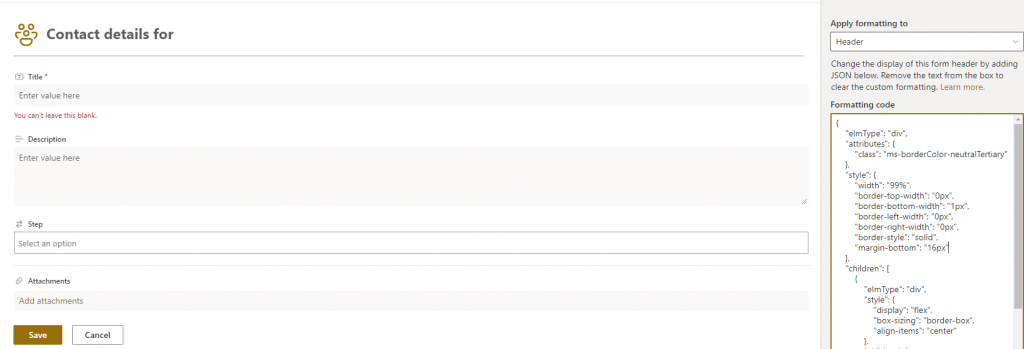
Choose “Header”. How can we customize it?
We can start from official MS Docs , copy header JSON code and try it:
{
    "elmType": "div",
    "attributes": {
        "class": "ms-borderColor-neutralTertiary"
    },
    "style": {
        "width": "99%",
        "border-top-width": "0px",
        "border-bottom-width": "1px",
        "border-left-width": "0px",
        "border-right-width": "0px",
        "border-style": "solid",
        "margin-bottom": "16px"
    },
    "children": [
        {
            "elmType": "div",
            "style": {
                "display": "flex",
                "box-sizing": "border-box",
                "align-items": "center"
            },
            "children": [
                {
                    "elmType": "div",
                    "attributes": {
                        "iconName": "Group",
                        "class": "ms-fontSize-42 ms-fontWeight-regular ms-fontColor-themePrimary",
                        "title": "Details"
                    },
                    "style": {
                        "flex": "none",
                        "padding": "0px",
                        "padding-left": "0px",
                        "height": "36px"
                    }
                }
            ]
        },
        {
            "elmType": "div",
            "attributes": {
                "class": "ms-fontColor-neutralSecondary ms-fontWeight-bold ms-fontSize-24"
            },
            "style": {
                "box-sizing": "border-box",
                "width": "100%",
                "text-align": "left",
                "padding": "21px 12px",
                "overflow": "hidden"
            },
            "children": [
                {
                    "elmType": "div",
                    "txtContent": "='Contact details for ' + [$Title]"
                }
            ]
        }
    ]
}
So , now we can see result.
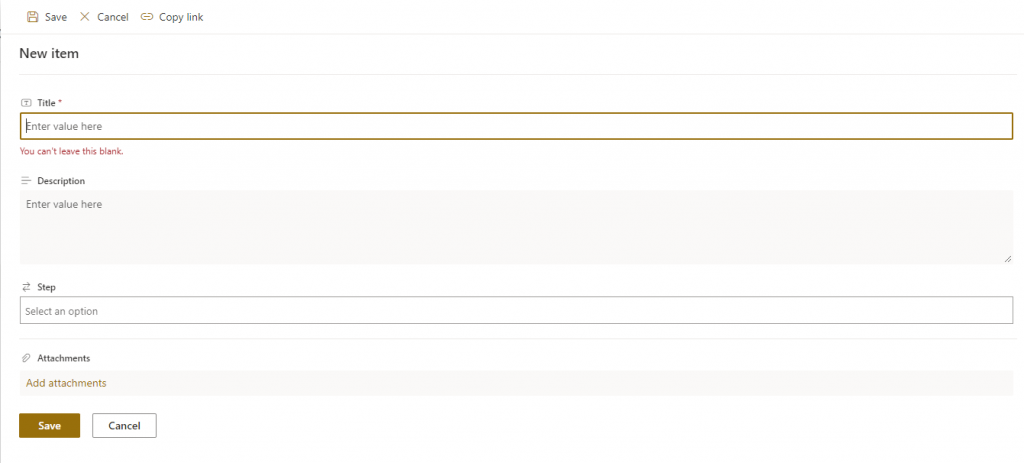
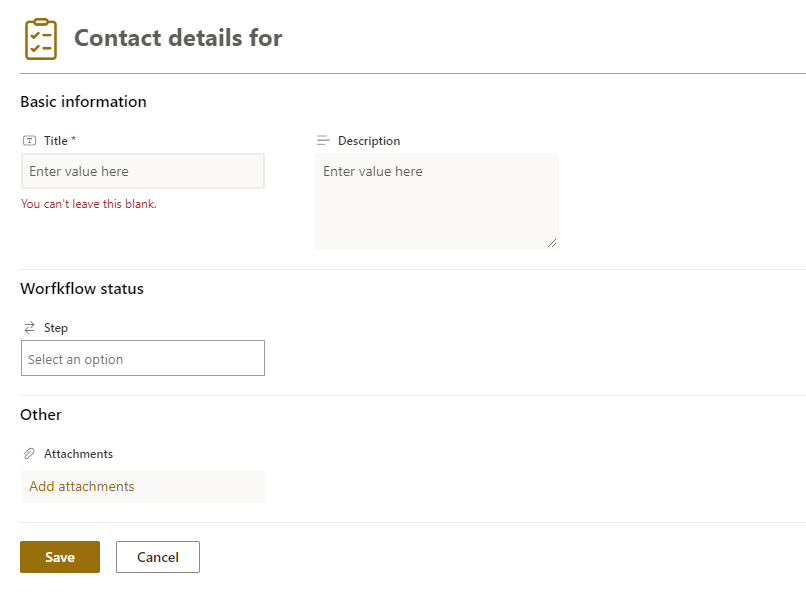
Before:
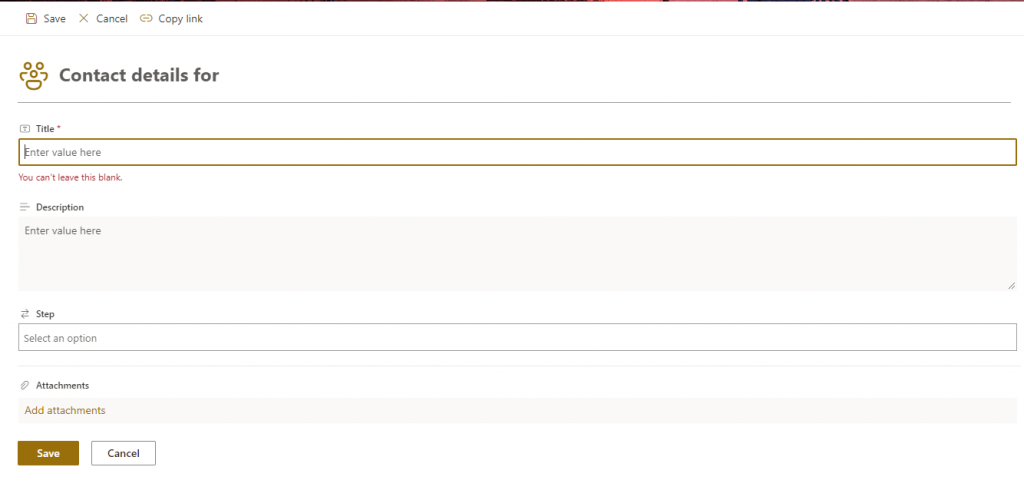
After:
How to edit?
Basically, our JSON going to apply style to these section:
{
    "elmType": "div",
    "attributes": {
        "class": "ms-borderColor-neutralTertiary"
    },
    "style": {
        "width": "99%",
        "border-top-width": "0px",
        "border-bottom-width": "1px",
        "border-left-width": "0px",
        "border-right-width": "0px",
        "border-style": "solid",
        "margin-bottom": "16px"
    },
Element:
 "elmType": "div",
    "attributes": {
        "class": "ms-borderColor-neutralTertiary"
    },
Style
  },
    "style": {
        "width": "99%",
        "border-top-width": "0px",
        "border-bottom-width": "1px",
        "border-left-width": "0px",
        "border-right-width": "0px",
        "border-style": "solid",
        "margin-bottom": "16px"
    },
Some people asking me, “How can I find witch section I’m modifing? I’m not expert” , an Idea is : Add background color red to style to indentify section:
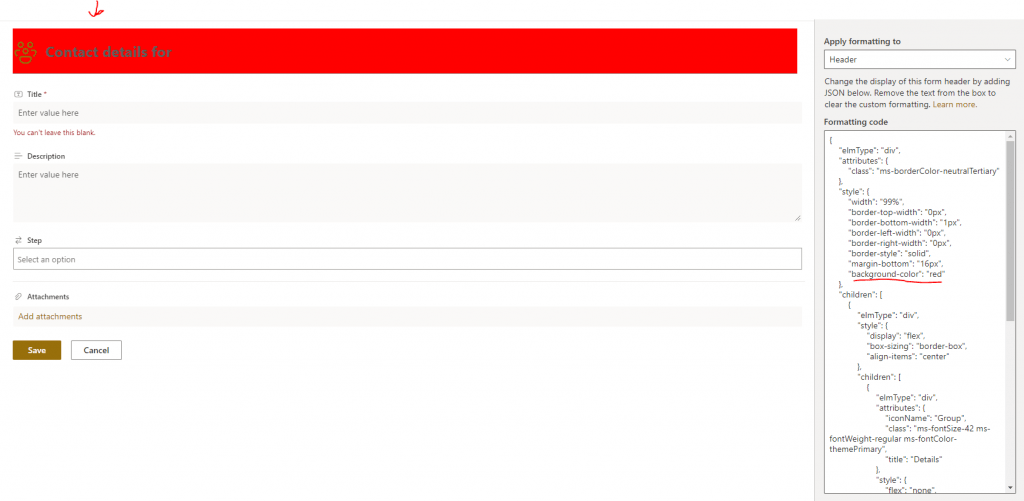
Not beautiful to see, but simple to identify 🙂
Body customization
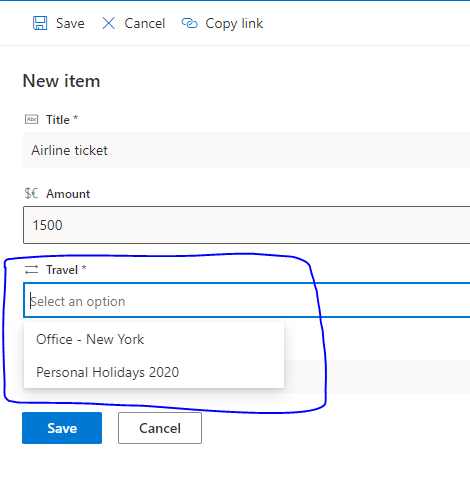
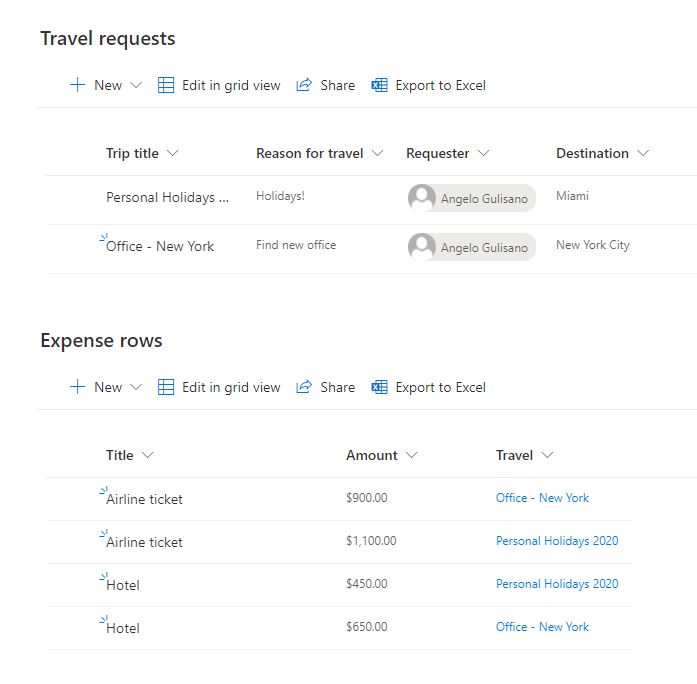
To customize Body, you should simply define Sections and fields, in my case:
{
    "sections": [
        {
            "displayname": "Basic information",
            "fields": [
                "Title",
                "Description"
            ]
        },
        {
            "displayname": "Worfkflow status",
            "fields": [
                "Step"
            ]
        },
        {
            "displayname": "Other",
            "fields": [
                "Attachments"
            ]
        }
    ]
}
Footer Customization
Now the last part, footer. Similar to header, we can write JSON for a part to customize
{
"elmType": "div",
"style": {
"width": "100%",
"text-align": "left",
"overflow": "hidden",
"border-top-width": "1px"
},
"children": [
{
"elmType": "div",
"style": {
"width": "100%",
"padding-top": "10px",
"height": "24px"
},
"children": [
{
"elmType": "a",
"txtContent": "='This is footer section! ' + [$Title]",
"attributes": {
"target": "_blank",
"href": "='https://aka.ms/contacts?email=' + [$Title]",
"class": "ms-fontColor-themePrimary ms-borderColor-themePrimary ms-fontWeight-semibold ms-fontSize-m ms-fontColor-neutralSecondary–hover ms-bgColor-themeLight–hover"
}
}
]
}
]
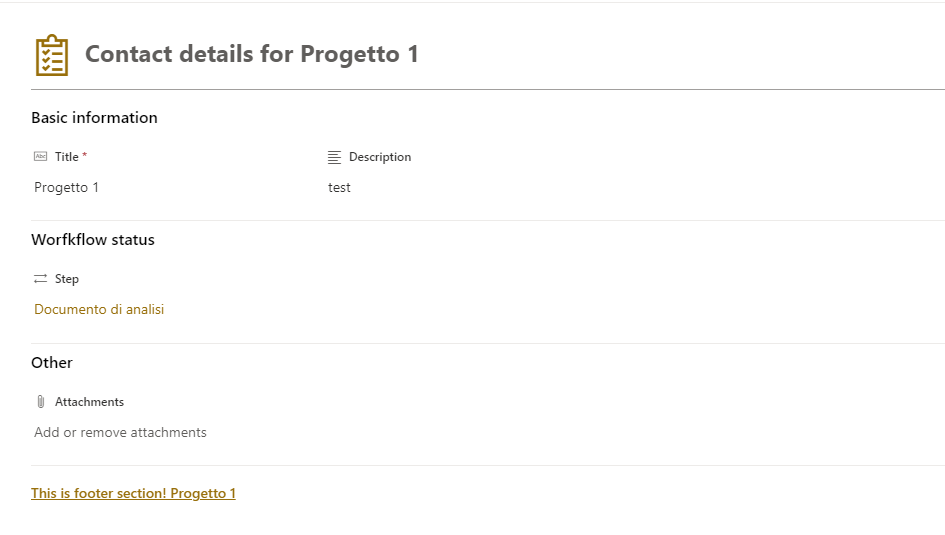
}As you can see , you can also use field of the record , in our example title: [$Title].
References & info
Syntax
Advanced formatting concepts
https://docs.microsoft.com/en-us/sharepoint/dev/declarative-customization/formatting-advanced
Where you can find icons name
https://developer.microsoft.com/en-us/fluentui#/styles/web/icons
Column formatting
Considerations
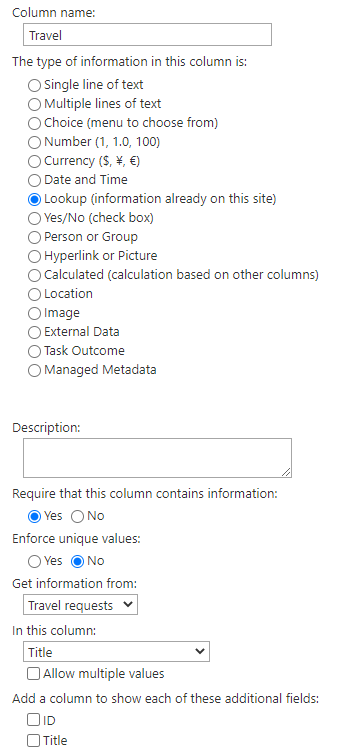
This is one way. Another option is modify form with Power Apps, let me know if you want an article to understand how.
Contact me for questions! Have a nice day!